Showing posts with label pasta. Show all posts

Saturday, July 9, 2011

When The Males Let You Down...


...no offense to any guys out there, of course I'm talking about male squash blossoms. :D

Anyone who has grown cucurbits has probably encountered this problem: male and female blossoms don't open at the same time. Well, at least not at first. It doesn't always happen in this order, but this year I've got lots of female blossoms while the males are lagging far behind! Come' on guys, get blooming! 

Male blossom (hubbard squash)                                       Female blossom (hubbard squash)
While we're waiting for the males to catch up, the squash on the female blossoms won't get pollinated and grow; they'll just fade on the vine. There's a yummy solution though--fried squash blossoms. 

There are more delicate and refined ways to prepare these little gems, but I really like them fried in batter...the blossoms are especially good (just check to make sure there's no little insects hiding in the buds before you get started).

I'm growing blue hubbard squash and zucchini this year, and we snacked on the unpollinated squash from both. The hubbards were a little bitter, but they were only a little bite each, so it scarcely mattered. The zucchini were quite nice, and the blossoms are toothier than you'd think they'd be. 

Tasty!
And to make up for being such a lazy blogger, here are some other eats we've had lately:

Portabella and green pepper fajitas with all the fixins'


Nachos

I like to make homemade chips by cutting fresh corn tortillas into triangles, brushing them with a mixture of soy sauce, lime juice, and nutritional yeast, and baking them. They're yummier than regular old corn chips and, I guess they're a little healthier too because there's less fat. 


And now, for any vegan cheezsters that might be reading, here's a little vegan cheese interlude. I bought some Vegan Gourmet on a couple occasions lately, and I've been pleasantly surprised. (I always like to tell myself that I'm going to make my own nut cheese, but somehow, I rarely get around to doing it.)


We've tried this brand in the past and didn't like it. But, maybe they've changed their formula, or maybe our tastes have changed. At any rate, it's been pretty good this time round. It doesn't have as much flavor as Daiya, but when it's melted, the texture is nicer. I've always found Daiya to be on the slimy side when melted. There's no weird plastic-y smell from it as it heats up either, which I remember from my previous experience with FYH.

This was a particularly yummy batch of lasagne with some of Vegan Gourmet on top, which melted nicely. 


The filling was the star though: firm tofu, thick cashew cream, pine nuts, garlic, nutritional yeast, white miso, ume plum vinegar, lemon juice, and black pepper blended in a food processor, with chopped fresh parsley and basil stirred in at the end. Next time I make it, I'll try to record the measurements, because it had a serious yum factor going on.

Lucky says, "Have a great weekend, everyone!"


Roseann Marie Laponte
Rosanne Tobin
Roseann Laponte

Monday, April 25, 2011

Kelp Noodle Salad and Other Important Things, Including Rhubarb "Mead"


I was at the store recently, when some kelp noodles caught my eye. As something new and interesting to try, they were calling out to me, but I'll admit that I was a little hesitant as well. I like sea vegetables when they have a mild flavor. I'm down with some arame seaweed or a little wakame. I can even handle a little bit of dulse in small doses, but I'm not an all-out seaweed lover...If the flavor is too strong it literally makes  me gag. So, the first thing that crossed my mind was "what if they turn out really seaweedy?...Gulp!" But, as I read through the package, the words "Neutral Flavor" won me over.

There are  a few recipe ideas on the back of the package. One for a miso/peanut noodle salad sounded especially tempting, and I'll try that next time. But today, I wanted to go for something more low-cal, so decided on a soy-wasabi salad:


For the veggie base, I used green onions, sunburst squash, red pepper, carrot, celery and daikon.


The package just gives the ingredient list for the dressing, not the measurements, so here's what I ended up throwing together: 2 Tablespoons Bragg's Aminos, 1 Tablespoon raw agave, 1 Tablespoon seasoned rice vinegar, a good splash of cider vinegar, 1 clove minced garlic, and 1/2 teaspoon wasabi paste. I went light on the wasabi...a little bit more would have been good though.
You don't have to cook these noodles;  they're ready to eat right out of the bag. Here's what they look like: 


According to the package, these little noodlers have a lot going for them: fat-free, gluten-free, low cal and low carb, and they are a source of many trace minerals including iodine.  

My verdict? The texture is great, a little bit rubbery and toothsome...maybe not everyone's cup of tea, but I really like it. The flavor is indeed neutral; the noodles add texture and serve as a vehicle for the dressing, while the core of the salad's flavor comes from the veggies you choose. All in all, I'm glad I gave these a try. They'll be fun to add to salads and switch things up a bit.


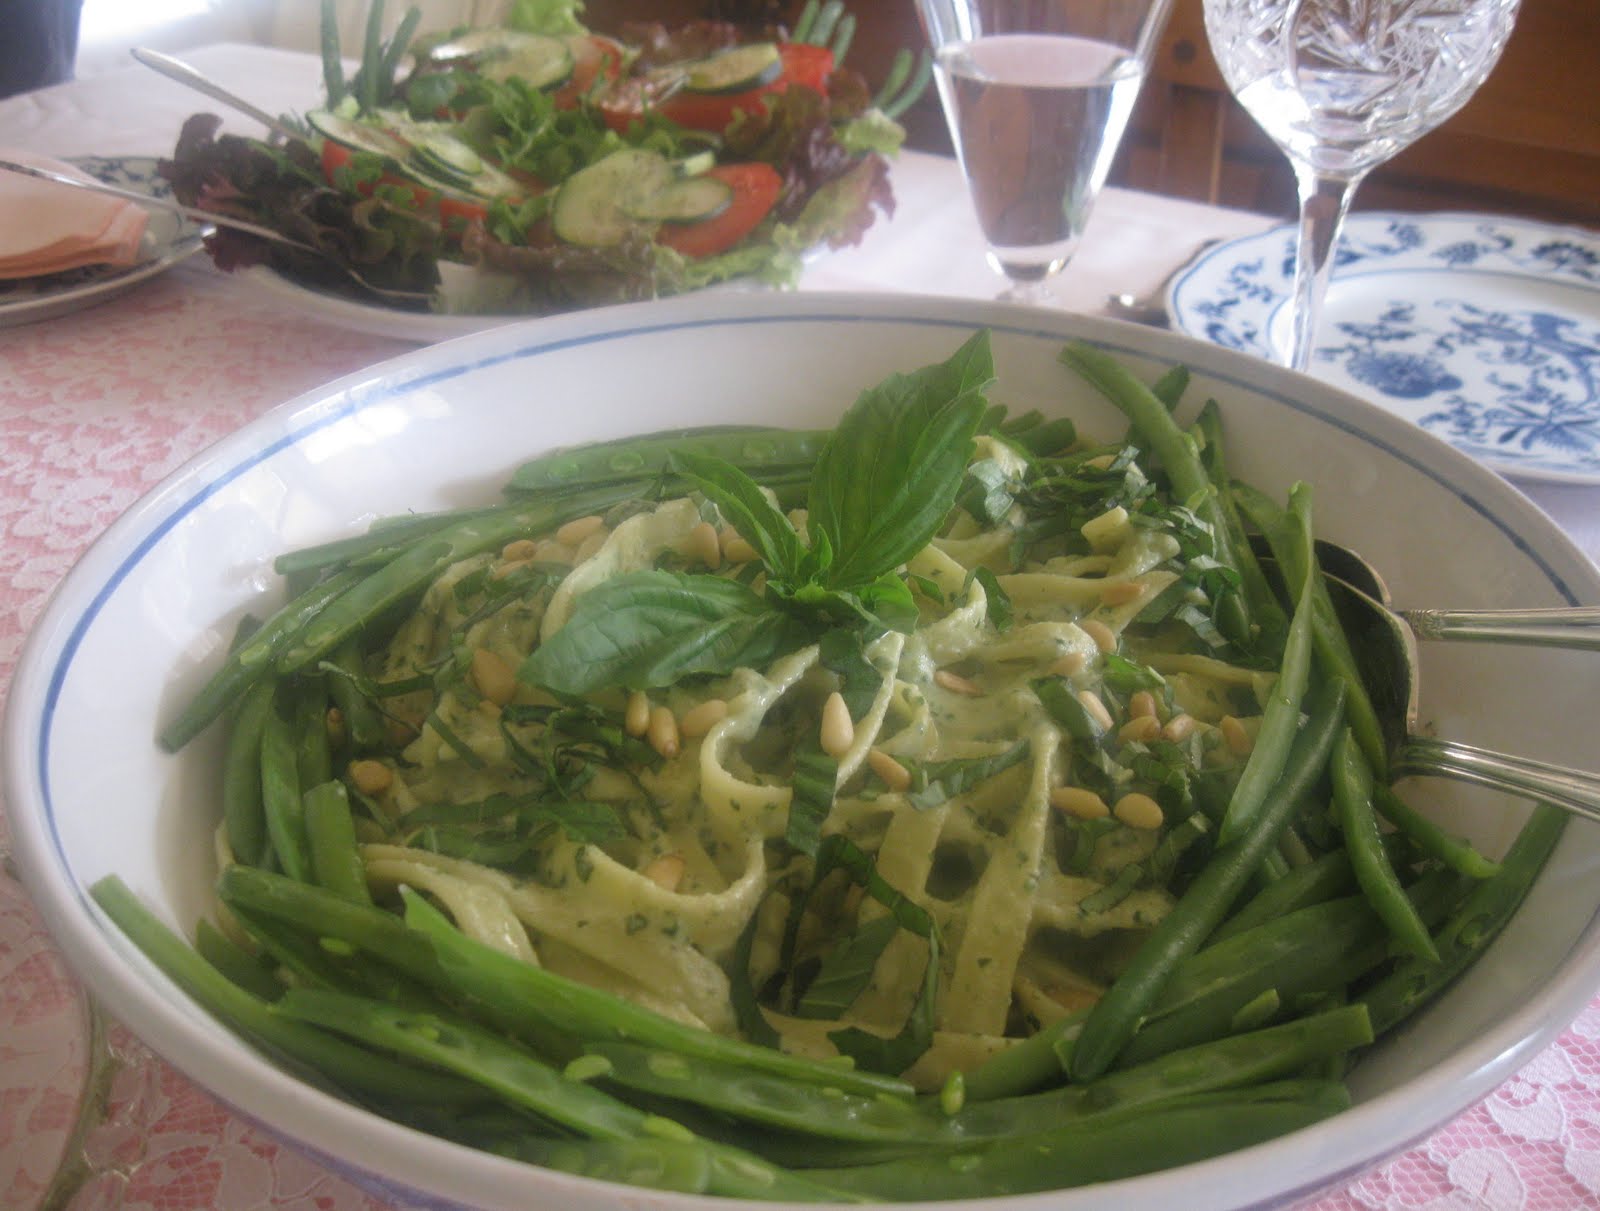
Part of the reason I wanted to eat light today was because yesterday (Easter) was quite a feast. We didn't plan on it being quite so sumptuous...it just sort of happened that way. For the vegan main course, I made some fettuccine in cashew-basil cream. It was a winner; everyone enjoyed it. 


I didn't measure the sauce when I was making it, but here's roughly what I put in:

Cashew Basil Cream Sauce:
1 generous cup raw cashews, soaked in water for an hour or so
2 generous Tablespoons pine nuts
2 cloves minced garlic
1/8-1/4 cup nutritional yeast (to taste, I usually go for 1/4 cup)
6-8 drops ume plum vinegar (because it's quite salty and tangy, I just drizzle a bit in...you'll have to adjust to your tastes)
1 generous/heaping Tablespoon white miso
2-3 Tablespoons fresh lemon juice ( I usually go for more like 3)
1.5 cups water
Generous 2 cups chopped fresh basil leaves
salt and pepper to taste

Drain the cashews and blend in food processor with the rest of the ingredients, except the basil. Add the water gradually until you get the smoothness and consistency you want, I went for a thick consistency that was still "pourable".  For a nice smooth consistency, blend it for several minutes. When you've achieved the consistency you want, toss in the chopped basil leaves and pulse a few times to blend through.

Toss the cashew/basil cream with some drained noodles that are just on the verge of al dente and gently heat through. Serve right away with lightly steamed green beans, and some pine nuts and basil shreds to garnish. Pretty yummy stuff!

In addition to the pasta we had broccoli, pineapple, sweet potatoes, salad, and some rye bread. My mom also made some awesome fresh tomato salsa for hors d'oeuvres:


We had strawberry pie and coconut milk ice cream for dessert...sorry no pics. See, what I mean about the feasting?

Now, for a rhubarb "mead" update for anyone who might be interested. Over the weekend, we broke open the rhubarb mead I posted about here. It's a lovely color, lightly effervescent and has a mild flavor, not terribly rhubarby though. (rhubarby...that sounds funny! :D)


Alessandra suggested that it might be more aptly named rhubarb beer...kind of like ginger beer, and I'm inclined to agree. There is only a trace amount of alcohol in it, which can be either good or bad depending on your perspective. Personally, I was hoping for something wee bit stronger. But, it is refreshing mixed with some sparkling water or other sparkling juice, and we'll certainly enjoy sipping it from time to time as the weather warms up. 

And last but certainly not least, I want to give a big Thank You to Rebecca of Enjoying the Journey blog, who was my seed swap partner. Cassie of Vegan Fox fame hosted a seed swap this month, which I thought was a fun idea. 

Rebecca sent me some kale, lavender, and lemon cucumber seeds, all of which I love. She also included a handy seed-starting guide and some fun animal rights stickers. Thanks Rebecca! I'll plant the kale and lavender now, and the cucumbers I'll start in early June. 

Friday, April 22, 2011

"Pasta ch' i sardi" one of the most famous Sicilian dish in the world


Do you know how to prepare the famous Sicilian pasta with sardines? First of all let's specify that in Sicily we learn that the period for fishing and eating sardines is during the months that have a "R letter". (In italian are February, March, April, September, October, November, December).

Said that you should know that the main ingredients of this dish are: sardines and wild fennel. As I always write about very traditional dishes it's very common to find different versions of the same dish, depending on which province of Sicily you are from, but also on the individual family tradition.
On the whole, I would say that there are two main recipes for this pasta: the red one and the white one. What does it mean? It means the version with the tomato paste and the version with saffron instead.
Ingredients & preparation for 4 people: 
- 400 gr. bucatini (long and thick shaped pasta like in the pic above)
- 250 gr. fresh sardines
- 400 gr. wild fennel
- 5 anchovy fillets
- 30 gr. sultanas
- 30 gr. pine nuts
- olive oil
- a small onion thinly chopped
- salt
- 6 ts of breadcrumbs
- 20 gr. saffron powder (for the white/yellow version)
- tomato puree or concentrated tomato extract (for the red version)

1. Wash sardines well under running water. Then wash also fennel and boil it in a large pot with salted water. Once it is cooked, drain it but do not eliminate the water. On a cutting board chop the fennel thinly and leave it aside.


2. In a sauce pan put a drizzle of olive oil on a medium heat, add the chopped onion and let it brown for a couple of minutes.
Add the anchovy fillets cutting it in small pieces using a wooden scoop or spatula just like in the pic on the right. They have to melt and become a paste.


3. Then put sultanas and pine nuts mixing all together.

4. Take half the quantity of the sardines, (leaving out the ones that are not broken that will be used after) and mix them in the sauce in small pieces too.


5. At this point add the saffron if you are doing the white/yellow version, or add some tomato puree if you prefer the red one (pic on the left). It's important to melt the concentrated tomato that has to become again a sort of paste. You can put a bit of fennel water to help melt the tomato puree.


6. Finally put the chopped fennel in the pan, together with a dipper full of the water in which has cooked. Mix well and place on top of the fennel the remaining sardines that should all be in one-pieces.


7. Let cook the sauce with a lit for about 10-15 minutes on a low heat. (Picture below)


8. In the meantime cook the pasta (bucatini or ziti) in the remaining fennel water as usual and drain it. If the water is not enough for all the pasta add some more water but remember to check the pasta on salt before draining it.


9. While pasta is cooking, in a small frying pan on a medium heat prepare the breadcrumbs with a drizzle of olive oil and stir the two ingredients until they become homogeneous and kind of dark brown in color (but not burnt).


10. Now you can either place it on a serving dish covering it with all the condiment and sprinkle the breadcrumbs on top and eat it as it is or doing the same process but placing it on a oven tray and bake it for about 10 minutes at a temperature of 200° C. 

Serve hot and enjoy the great Sicilian taste!

Tuesday, March 1, 2011

Mezze penne with broad beans and ricotta cheese


Do you know how to cook a plate of pasta with fresh broad beans (or fava beans) and ricotta cheese? Here in Sicily we love mixing vegetables with cheese. For 4 people you will need: 400 gr pasta (penne or mezze penne) - 1onion - 150 gr. broad beans - olive oil - salt - ricotta cheese - grated cheese


First of all, you need to shell the broad beans. In a sauce pan on a medium heat put a drizzle of olive oil, then chop and sautè the onion with the oil. Add a big pinch of salt and the broad beans. After about 6-7 minutes add some warm water (2 cups). Cover with the lit and let cook for other 20 minutes on a low heat. When the fava beans are cooked remove them from the heater and put on a larger pan for cooking the pasta, on a high heat.


As soon as the water boils add salt and put the penne (or mezzepenne) in the boiling water. Cook them until "al dente" (or 2 minutes more if preferred), just following the instructions written on the packet. Then drain and transfer them on serving plates mixing also the broad beans.


Once the plate is ready put some fresh ricotta cheese on top. Many people love to add some grated cheese as well, such as caciocavallo or parmesan. The taste of this kind of pasta is very good and delicate and is healthy too. Enjoy!

Monday, February 21, 2011

VegNews Vegan Alfredo


If you have the March-April edition of VegNews, you might have seen the recipe for fettuccine alfredo. If you haven't yet, you've got to try it.

I tried to find the recipe published online, but I couldn't find it, which is a shame. I think they send out the edition to subscribers before it hits the shelves in the stores, so I'll keep looking for it. Maybe when they update their website with the March-April edition, the recipe will be available online.

The sauce is your average cashew cream variety with some pine nuts thrown in, then thinned with water, lemon juice, and some garlic, nutmeg, and black pepper. (I left out the nutmeg for a fussy eater.)

The recipe didn't call for it, but I added a tablespoon of white miso, a few drops of ume plum vinegar and extra garlic...for garlic lovers, this is a great vehicle for some intense garlic action. Oh yeah, and I tossed in a handful of mozzarella-style Daiya, since I had some in the fridge I needed to use up. It all came together for a tasty sauce.

Then, I sauteed some yellow pepper, slivered garlic, (in keeping with the intense garlic theme) and broccolini to toss with the pasta and the alfredo sauce. Garnished with green onion slices and fresh oregano, it was a flavor bomb. Oh, and don't forget plenty of fresh ground black pepper.


It hit the spot with some spinach and roasted eggplant rollups: thinly sliced eggplant brushed with garlic-infused olive oil and a pinch of sea salt, then roasted until brown and garnished with a squeeze of fresh lemon. They're tasty little treats; we ate most of them before they made it onto the plate! 

Roseann LaPonte
Rosanne Tobin

Thursday, February 3, 2011

Caserecce with broccoli and red pepper


Separate broccoli into stem and florets and wash them under running water, then chop them in small pieces. In a pan under a medium heat boil the broccoli in salted water until become very soft. In the meantime in a sauce pan do the "soffritto": some extra virgin oil of olive and a clove of garlic, then sautè the boiled broccoli there, adding a piece of hot pepper.

Cook the caserecce (or the spaghetti if preferred) in the water of the broccoli until "al dente", then drain them and put in serving plates with the broccoli sauce. Add some grated parmesan and voilà... this delicious pasta is ready. Enjoy!

Saturday, January 8, 2011

Spaghetti with dried tuna roe, the famous "Bottarga di tonno"


Do you know what the famous "Bottarga" is? And how do you cook it with pasta? "Bottarga di tonno" is basically the roe of the tuna, first dried and then grated. Here in Sicily having pasta with the tuna roe is a real deliciousness and is a very quick dish to prepare as well!

You will need: spaghetti - oil of olive - garlic - fresh parsley - bottarga di tonno (tuna roe) - red hot pepper.

Cook the spaghetti in plenty of boiling water, lightly salted, following the packet instructions, until "al dente". In the meantime in a sauce pan do the "soffritto" which means: put some extra virgin oil of olive and a clove of garlic until it becomes kind of golden brown colour. Chop the parsley and mix it in the oil. Add some boiling water from the spagnetti pan and finally a small piece of hot pepper.

When the spaghetti are ready drain them and mix them with the sauce made of oil and parsley. Then serve them sprinkled with abundant bottarga on top, just like in the picture.
It is a lovely pasta and very easy to cook. Enjoy!

Wednesday, November 17, 2010

Tailor's Collar Soup or Szabógallér-leves


**Post Factum:** 
This is one of a series of posts for Vegan MoFo 2010; my theme was a 'Virtual Random Road Trip', where I used random.org's random geographic location generator to select locations around the globe, I then attempted to cook a few dishes from the traditional cuisine of that place. I didn't have a lot of time between generating the locations and coming up with recipes (~ 1 day). So, lacking time to do proper research, I can't vouch for the authenticity of anything I came up with. However, they are what they are, and it was a fun theme. 

Szabógallér-leves is a traditional Hungarian soup: "leves" = soup, and Szabógallér = tailors' collar, which refers to the triangular ravioli-esque dumplings that are in it. This is a rich broth with veggies, dumplings, and in this veganized version, baked tofu.

For this, I made two varieties of ravioli/dumpling fillings (traditionally meat) which were potato-chive-parsley, and walnut-sun dried tomato-paprika. I was torn as to which sounded better, so I made some of each. The dough is just a basic pasta dough...I always use Vegan Dad's recipe, which I highly recommend because it's easy to make and just as easy to work with.

To get started, make the dumplings:

Vegan  Szabógallér-leves Dumplings (Soup recipe follows)

(Of course, these fillings are just my suggestions...whatever mixture that sounds good to you would work.)

1 batch Vegan Dad's pasta dough

Walnut-Sun Dried Tomato-Paprika Filling:
1 cup raw walnuts
6 sun-dried tomato halves, chopped into small peices (if using dry packed ones, reconstitute them in some warm water or broth for about 30 minutes first)
pinch of salt
1/2 teaspoon paprika (use sweet or hot...whatever suits your fancy)
1/4 teaspoon garlic powder (or to taste)

Pulse all ingredients in a food processor until you get a mince-like texture.

Potato-Chive-Parsley Filling:

1 large potato
1 small handfull chives, chopped fine
1 small handfull parsley chopped fine
pinch of salt
Earth Balance or olive oil to taste

Boil the potato, then make a mash with the remaining ingredients.

Once you have your fillings and your dough made, roll out the dough to about 1/16 inch thickness. Cut out circles (~ 4-6 inches in diameter...the bigger the circle, the easier they are to make).

Cut each circle in half and place about 1 teaspoon (or more if it will fit) of filling on one side of the half circles. Make a "glue" by mixing 1 tsp flour with a little water to make a paste. Brush the pastry "glue" around the edges of each half circle. Fold the dough over lengthwise, and press the edges firmly, but gently with your fingers or a fork to seal the dumplings.


Now for the soup:

Vegan  Szabógallér-leves/Talior's Collar Soup
(serves 4)
6 cups rich veggie broth ( I used 1 cup no-beef broth, 2 cups low-sodium veggie broth, and 3 cups water)
1 medium onion, diced
1 clove garlic, chopped fine
2 carrots, diced large
1 (smallish) celeriac bulb, diced large
8 oz soy-baked tofu, cut into 1/2-inch chunks (I just marinated a few thick slices in soy sauce and baked them in the oven for ~ 10 minutes)
1 teaspoon whole pepper corns
Pinch of paprika (sweet or hot) to taste
Pre-made dumplings (see recipe above)
Salt if needed: depending on how salty the veggie broth is, you may not need to add any salt...taste and add salt if desired at the end

Saute the onion slowly over medium-low, allowing it to caramelize a little. Add in the garlic and saute for another ~ 2-3 minutes. Add in the peppercorns and veggie broth and bring up to a simmer. When the broth is simmering, add the carrots and the celeriac and continue to simmer gently. About 8 minutes before serving, gently drop in the dumplings and the tofu and continue to simmer until the dumplings float to the top. Taste for salt, add to taste if needed, and sprinkle with paprika to finish if desired.

dumplings and veggies simmering in broth
(The corner where my stove is has to be one of the darkest corners known to man.)

Note: The original recipe called for parsley root, which I didn't have. So, you may also want to add some parsley root along with the celeriac and carrot if you can find it.

This is a hearty and tasty soup; perfect for using autumn vegetables.


In doing some image searches, I see that the Hungarian capital is a beautiful city indeed:

Széchenyi Chain Bridge over the River Danube between Buda and Pest 
and the Royal Palace Buda


Matthias Church (Mátyás Templom)

Matthias Church (Mátyás Templom) by night


Budapest's Széchenyi Baths

Back in a day or two with another dish from Hungary. (All Hungarian, All the Time)
Rose Tobin Seattle
Roseann LaPonte
Rosanne Tobin

Wednesday, July 21, 2010

Chilled Raspberry Soup w/ Thai Flavors (& Ravioli Follow up)


These past few weeks, we've literally been buying pounds of fresh berries at the farmers' market and munching on them as snacks, dessert, and everything in between. That's just thing with berries; you can toss those little jewels in anywhere (especially your mouth!).

This soup may not suit everyone's tastes...it's a bit on the tart side and you have to like the flavors of cilantro, lemon grass, and kaffir lime. (Of course, cilantro-averse people could sub basil or mint, or any herb that suits their fancy.)

Although I give approximate measurements of what I used below, I intend this as more of a recipe idea rather than an actual recipe.  I encourage anyone who tries this to add the ingredients in little by little adjusting to suit your own tastes and/or subbing with other flavors that sound good. The end result in this case came out in a strong raspberry flavor with subtle hints of lime and lemongrass.


And one last thing: I didn't sieve the raspberries...we don't mind the errant seed and a slightly thicker texture, but it's up to you...*if I were serving this to company, I would definitely sieve them first.* :)

Recipe Idea   (Makes 4 small appetizer servings or 2 average servings):

1 pound fresh raspberries, rinsed ( ~ 2 cups)
12 inches worth (~ 1/3 cup finely chopped) lemon grass,  tough outer leaves removed and cut into fine rounds
4-5 kaffir lime leaves, finely chopped (or more/less to taste)  ( I use dried ones)
1/2 cup finely chopped cilantro (or more/less to taste)
1 cup coconut milk (or more for a creamier, more coconut-y flavor)

Mix everything in a blender until smooth and allow to chill for at least 30 minutes. Serve chilled and garnish with cilantro and raspberries. As an afterthought, a bit of shredded coconut would be nice too.

PS: If you don't have a super blender...make sure you really trim off all the tough leaves from the lemon grass...get down to the really tender stuff... in order to avoid any stringiness.

And now for something completely different....

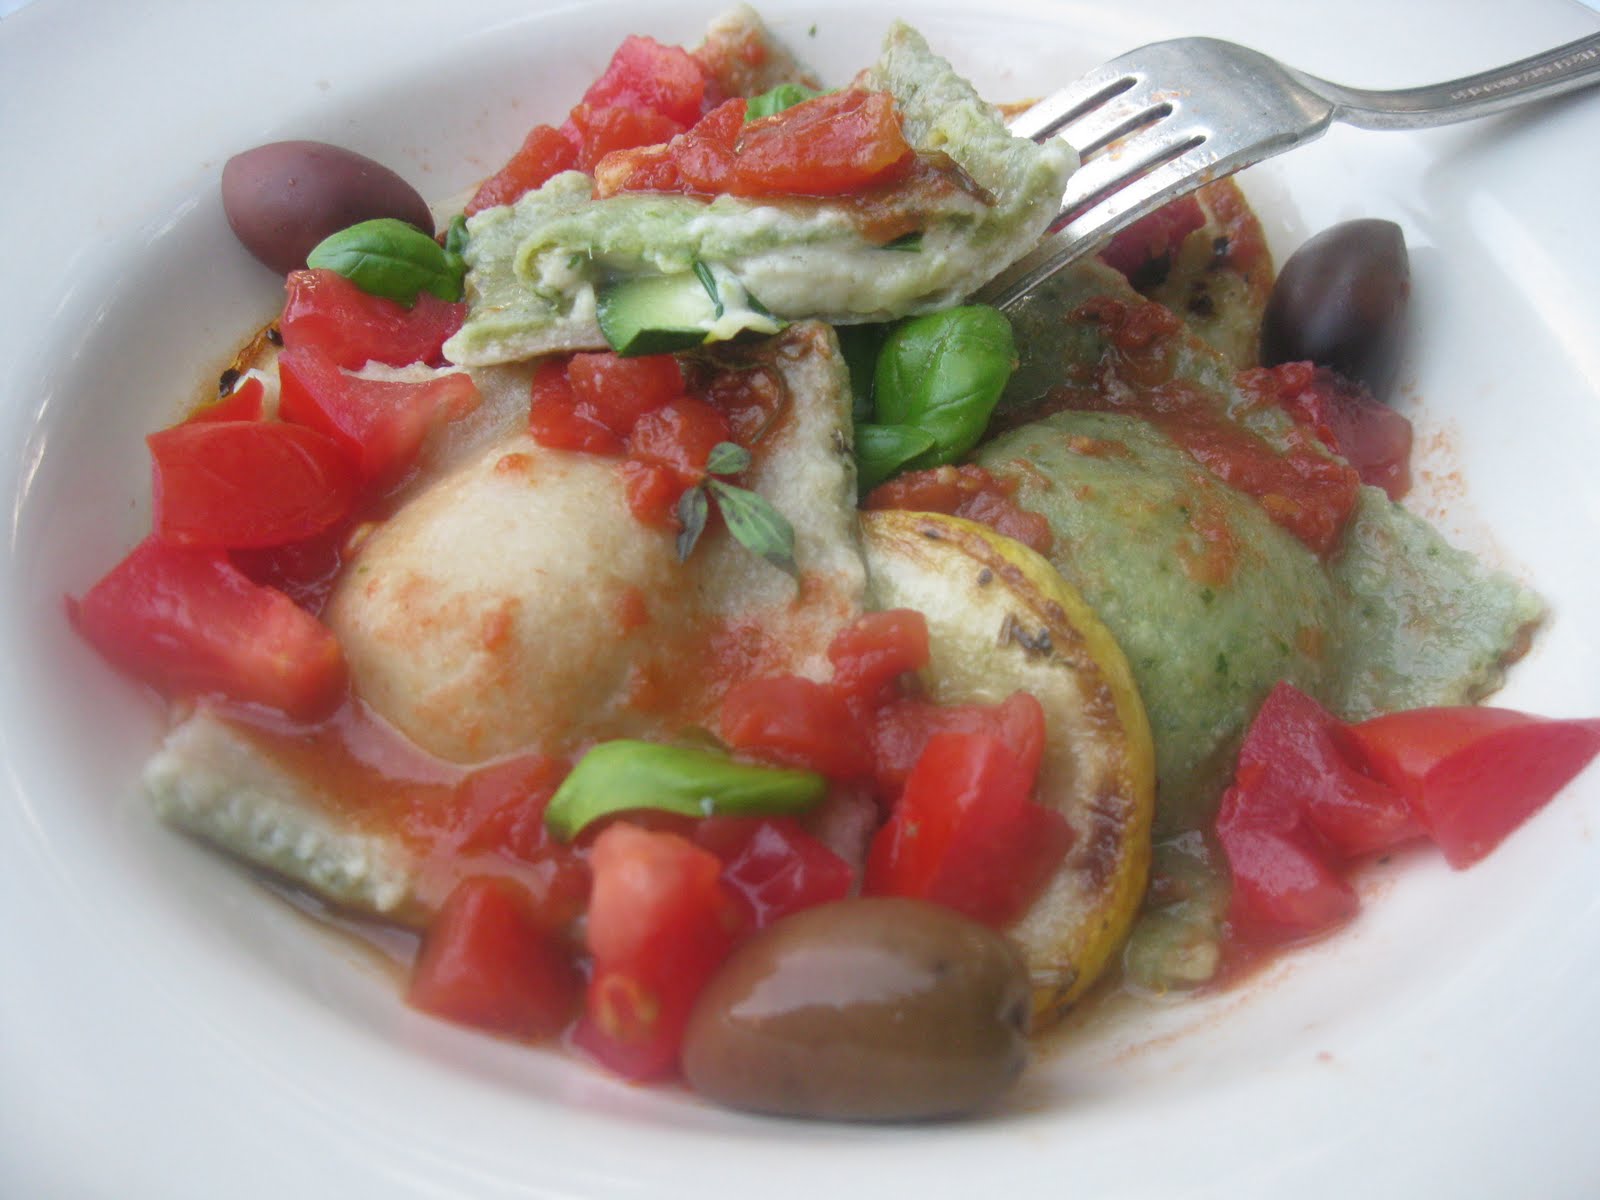
Here's a follow-up shot of the ravioli from this post...(in case anyone was wondering):


I served them with sauteed crook-neck squash and a fresh tomato sauce seasoned with garlic, red pepper flakes, and fresh oregano; garnished with basil and black olive.

Verdict: Thumbs Up.  The filling imparted a light lemony richness, while the summery flavors of fresh tomato and oregano gave a sweet-savory zing. The yellow squash was a nice textural component and added color.


Summer is fleeting by isn't it? I hope everyone is enjoying it.

Ciao for now.

Roseann LaPonte
Rosanne Tobin

Sunday, July 18, 2010

Ravioli Fun in Two Colors

Who doesn't love ravioli? I know they're one of my favorite things.  And sure, there are a few vegan ravioli options out there...but  if you have some extra time to spend in the kitchen, why not make some of your own? They're not that difficult to make (it's actually pretty fun) and, you have total control of what's in the filling...there's no end to the flavors and combos one can devise around those! They don't have to be picture perfect either, they just have to stay together while cooking and taste good.

This weekend, it so happened that I had some of that elusive stuff called spare time, so I decided to have some fun and make ravioli.  Inspired by a common pasta combo of green and yellow pasta called "paglia e fieno" or "straw and hay", I made two different doughs: a green dough  and a regular old plain pasta dough, which passes as yellow my book. (You could make it more yellow by adding some saffron, but I didn't bother with that.)


I think the green dough is traditionally made with spinach or nettles, but why not get a little crazy and try collards (or any other leafy green)?  It's not meant to impart any particular flavor--it is more for the color effect anyway.

For the dough, I usually go with Vegan Dad's recipe (Thanks Vegan Dad!), which I highly recommend. It's simple and makes a very easy-to-work-with dough. To make the green dough, I added about 12 (smallish-sized) collard greens to the regular recipe...all tolled, it was about 2 cups worth of finely chopped raw collards added to the basic recipe.


We don't have a pasta machine, but I find that provided you let the dough rest first, rolling it out by hand is just as easy.  Even if you do have a pasta machine, resting the dough is a good idea. To do this, roll the dough up into a ball, wrap it in some cellophane so it won't dry out and let it sit for 30 minutes or so. The dough becomes more relaxed and easy to work with after resting...isn't that true for us all? :)

Another important consideration is the workspace where you will you roll out the dough.  Make sure you give yourself ample room, and ideally the surface should be nice and cool...(i.e., it might not be the easiest thing to do in the midst of a heat wave). I use a granite slab pastry board that is ideal for working with doughs; it stays cool, and when lightly dusted with flour, nary a dough will stick.

In order to achieve sturdy ravioli that won't break open when you cook them, work gently with the dough, keeping a light dusting of semolina flour on your work surface and a tad bit on top of the dough and your rolling pin...you'll probably have to keep dusting it with more flour as you go. The important things are to get a uniform thickness in the dough and ensuring there are no tears or wholes in it.

Once rolled out to ~ 1/16 inch ( ~ 1.5 mm) thickness,  it may not look like a tidy bit dough to cut ravioli from, but that's easily fixed by trimming the dough to form a rectangle.


At this point, it's just a matter of dolloping the filling on in rows, placing the other half of the dough over it, and cutting out little squares.

You can make a sort of pastry "glue" by mixing some flour and water together (say 1 tablespoon flour and 2 tablespoons water) and brushing it around the dough where the edges of the ravioli will be. This will help the dough stick together.

After the squares are cut, gently reinforce the seal by pressing around the perimeter with your fingers. If you use a ravioli cutter, you get those nice little scalloped edges. (Alternately, you could make a half-moon variety of filled pasta, like the ones in this post.)


In the picture above, you can see where some flour/water "glue" is brushed around the filling.

Speaking of the filling,  I used a recipe for cashew cheese from The Conscious Cook cookbook. This recipe needs to be made in advance (you need to soak the cashews for several hours, and then another 14-16 hours for the probiotic cultures to form). Having ravioli on the brain this weekend, I started the cheese process yesterday morning. (Of course, you don't have to fill ravioli with cashew cheese, or vegan cheese of any kind for that matter...the options are limitless and up to your own taste, mood, and creativity.)

The basic method for making the cashew cheese is quite common and easily found online so I think it's safe to divulge. For instance, you can find the full recipe for the cashew cheese and what Mr. Ronnen makes with it here.

Basic cashew cheese method from The Conscious Cook, by Tal Ronnen:

Soak 2 cups raw cashews in water for 12 -14 hours. After the cashews have soaked, dissolve 1 tsp probiotic powder in 1 cup warm water, rinse the cashews and blend them in a food processor with the dissolved probiotics. Now, transfer to a clean bowl, cover and let it sit in a warm place for another 14-16 hours.

After it has set for the required amount of time...you can add in any extra ingredients you like for the filling. I didn't follow the rest of the recipe from the book, but rather added the following:

(not Tal's additions):

1/4 cup nutritional yeast
the zest and juice of 1 organic lemon
1/2 cup of finely chopped chives
1 cup diced zucchini
1 tsp sea salt (or to taste)

 lemon-chive cashew cheese with zucchini

The filling has a light lemon flavor and the zucchini pieces add a nice toothsome dimension.

Here's a shot of the top and bottom of the colored ravioli:

left=top  / right=bottom

If you wanted to get creative, you could probably come up with more artistic ways to combine the two doughs. For example, you could try overlapping strips of each dough slightly and rolling them out side by side to form one large stripey piece of dough...that would be fun. But I'll leave that for another day. I stuck with using one color of dough for the top and the other for the bottom, switching halfway through so some ravioli have green tops/yellow bottoms and some have yellow tops/green bottoms.

Here are the resulting ravioli. They're not picture perfect, but I'm pretty sure they'll hold together, and I sure hope they taste good:

ravioli colorati w/ collards and lemon-chive cashew filling


Once you have the ravioli made you can store them in the fridge for about 5-6 days, or freeze them. Freezing them is a good strategy because, in my experience, they tend to cook up better and without any breakage from a frozen state.

In order to avoid any breakages or filling mishaps, add them into gently boiling water and keep the heat such that they don't go into a rapid, rolling boil. Unlike regular unfilled pasta, ravioli don't fair too well at a rapid boil. You'll have to judge as you go how long to cook them...it will depend on the thickness of the dough and the shape/size of ravioli...but generally speaking, they are cooked when they rise to the surface...usually in about 6-8 minutes.


Ciao for now...have fun, make some ravioli!


Roseann LaPonte
Rosanne Tobin